The Send Invitations wizard leads you through the steps required to send email invitations. Before you send invitations, you need to decide whether you want to send them with authentication on or off. For more information, see the topic on protection and authentication.
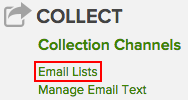
First, go to Surveys & Data Collection | Survey Hub | <desired_survey> | Manage. On the Manage Survey page, click Email Lists:

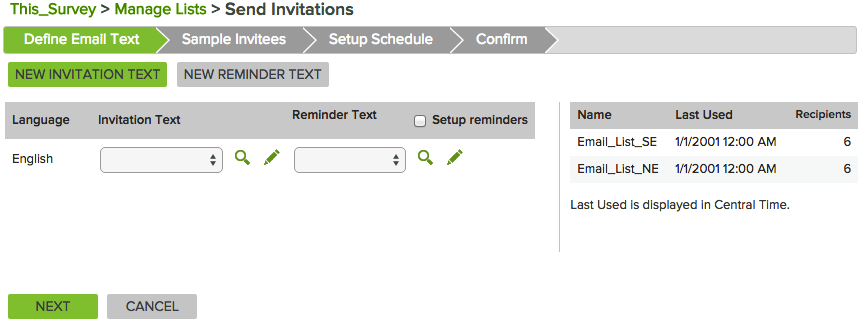
Sending invitations is made up of five steps:
Clicking the Email Lists link takes you to the page Manage Email Lists:

To create a new email list, see the topic on that. To send survey invitations, select one or more of your email lists and then click the Send Invitations button.

You should create invitation text for each language in your survey. In addition, you can create alternate text for use with different email lists.
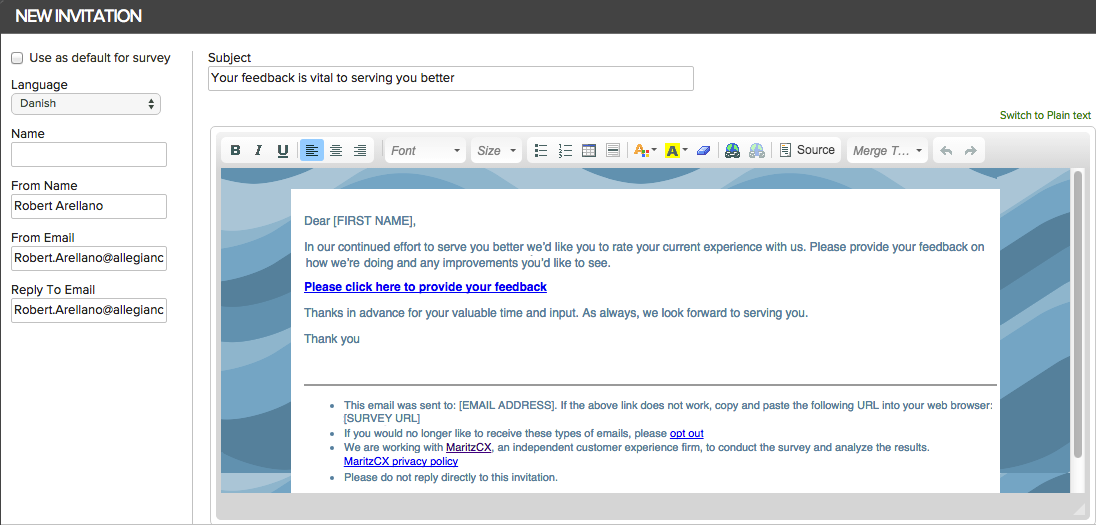
Click on the New Invitation Text button. The New Invitation screen appears:

Use the following fields to define your email text:
Mark this box if you want this text as the basis for creating additional versions.
Select the language for the invitation text. This does not translate the text; you will need to enter the translated text. The language selection here will be matched up with the language specified for each user in the email list to ensure that each potential respondent receives their invitation in the appropriate language.
Enter a name for the invitation text.
This is the name that will be used when sending the email. By default, it is the name of the person who owns the survey, but can be changed.
This is the email address that appears in the From: field of the email invitation. You can change it, if necessary.
This is the email address that appears in the Reply To: field. You can change it, if necessary
This is the subject line of the email.
Use the formatting toolbar to format the text of the message.
Click here if you prefer to enter your own HTML code.
This is the list of data that can be included in the invitation. You'll see system-defined fields, such as the survey URL, opt-out URL, and authentication. In addition, any fields that you map for pre-population when you create your email lists will also be displayed here and can be included in the invitation text.
Use this link if you need to send the email message as plain text. It will remove any HTML formatting.
Save the text.
Click here to preview the email text.
Use this link to send a test invitation. You can include values for each of the pre-populated fields. Keep in mind that the link in the test email will be a preview link; it will not collect any data, so don't forward it to other users.
When you are satisfied with your results, click Save. Your new email text appears in the dropdown menu:

Select it, then click Next.

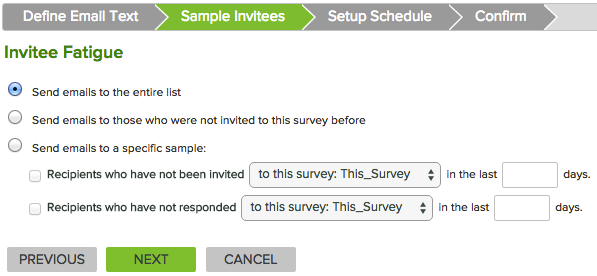
Over-surveying customers or employees results in low response rate and low satisfaction. Using the Invitee Fatigue settings, you can control how often users receive email invitations.
Send emails to the entire list - Sends email to every recipient on the list regardless of whether or not they have already been invited through another list.
Send emails to those who were not invited to this survey before - Looks across all email lists for the survey and sends only to recipients who have not been invited through another list.
Note: This does not look at email lists across multiple surveys.
Send emails to a specific sample - Allows you to invite only recipients who have either not received an invitation or not completed the survey within a specified number of days. For example, you might choose to not send invitations if someone has received an invitation in the last 30 days.
Click Next when you are done specifying your invitee fatigue settings.
On the Setup Schedule tab, you will see one of two screens, depending on whether you chose to set up reminders now or wait and schedule them separately. If you chose not to set up your reminders now, this screen will simply be missing the Reminders section.

Use this screen to define your emailing schedule.
Send invitations now - Begins sending immediately.
Send invitations on - Sets a date and time in the future.
Send reminders ... after invitation - Lets you set a specific number of days or hours after the invitation when reminders will be sent.
Send reminders on - Lets you set a specific date and time to send reminders.
Add another reminder - Lets you schedule additional reminders.
Use the dropdown menu to select your timezone.
Send emails as defined - Sends invitations and reminders as you scheduled them, regardless of when they fall within the week.
Send only within a specific timeframe - Lets you set specific days of the week and time ranges for sending invitations and reminders. If you set a date and time that falls outside of this timeframe, the emails will be sent at the next possible time that is within the timeframe.
Note: The Global Deployment Calendar is a tool that lets you view all the surveys that are deployed across your entire company. By using the calendar, you can see when other users are deploying surveys and schedule your invitations accordingly. To see it, got to Surveys & Data Collection | Survey Hub | More | Global Deployment Calendar.

Once you've set the schedule for sending emails and/or reminders, it's time to confirm that you are ready to schedule or send them. Review all the settings and ensure that it's the way you want it. Then click the Send Invitations Now or Schedule Invitations button.
Your invitations will be sent as you have specified.