Email lists for MaritzCX surveys are created by uploading a .csv or .txt file (sometimes referred to as a 'feed file'). Your file must contain an email address column, but, as a best practice, should also contain a first name and last name column so you can personalize your email invitations. In addition, you may choose to have additional fields with demographic data that can be used to automatically populate hidden questions on your survey.
Note: Your feed file must be either .csv or .txt. Any other file type will generate an error.
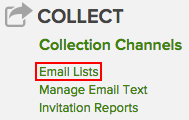
To create an email list, go to Surveys & Data Collection | Survey Hub | <desired_survey> | Manage. On the Manage Survey page, click Email Lists:

On the Manage Email Lists page, click New Email List:

The New Email List wizard appears. It is made up of four steps:

Do the following on this page:
Name of Email List - Give the name you want to the email list.
How would you like to add email recipients to this list? - Use the checkbox to select whether to upload a file or manually add recipients.
Upload the file - If you chose to upload a file, browse for the file you want to use.
What separates the columns? - If you chose to upload a file, select whether your file is comma-, pipe-, tab-, or semicolon-delimited.
Note: Your file type must be either .csv or .txt. The following screenshot illustrates a sample data file. It shows various columns that you might find useful in your feed file; however, the only one that is mandatory is Email_Address.

When you are finished, click Next.

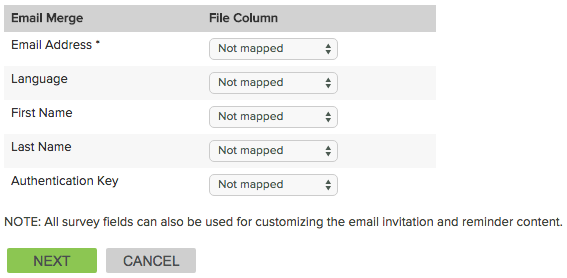
The Email Merge column represents the system fields that can be included within the email invitation text. Each field can be mapped to a column in the data file that contains the appropriate date. If the file column matches the name of the email merge field closely enough, it will automatically be selected. Otherwise, you can select it from the dropdown list and map it manually.
Notes: 1. Be careful with Language. If you have a language column in your file, it will automatically be mapped to the language field. However, if there are languages referenced in the file that are not translated within the survey, those rows will not be uploaded into the email list. Clean up your file first to eliminate any languages that you have not translated in your survey. 2. Authentication Key is usually not mapped. The exception is if you have a column in the file that contains unique values like account number or student id that you want to use as authentication keys rather than having the system randomly generate them. This is typically done when you are posting a link on a website and requiring the user to manually enter the authentication key rather than sending email invitations.
Use the dropdown menus to map whichever values you need to, then click the Next button.

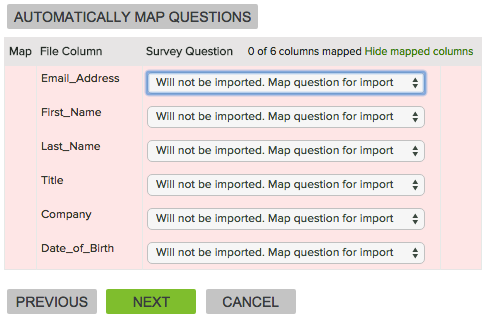
This tab lets you map columns from your .csv file to questions on your survey that you want to pre-populate. If you added tags to the survey questions that match the column name, you can use the Automatically Map Questions button to complete the mapping. Otherwise, use the dropdown list to manually map the fields to the questions.
Note: Any fields that you map here will also be available when creating email text, so the data can be used in the body of the invitation as well. For more information, see "Sample Management: Merge Fields".
Click Next when you are done.
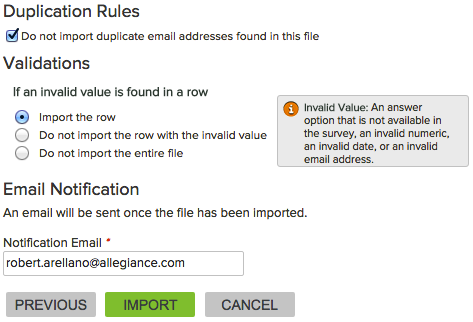
The last tab of the New Email List wizard is the Configure & Import page.

On it, take the following actions:
Duplication Rules - Check the box marked Do not import duplicate email addresses found in this file if you want only rows with unique email addresses to be imported.
Validations - Use the radio buttons to define what to do in the event that an invalid value is found in a row: import the row; do not import the row with the invalid value; do not import the entire file.
Email Notification - Specify the email address that will receive notification when the file import is complete.
When you have finished setting these preferences, click Import. A notification email will be sent when the process is complete. Also, the lists Status value on the Manage Email Lists page will change from "File Uploaded" to "Ready", meaning that you can use it.