Yes.
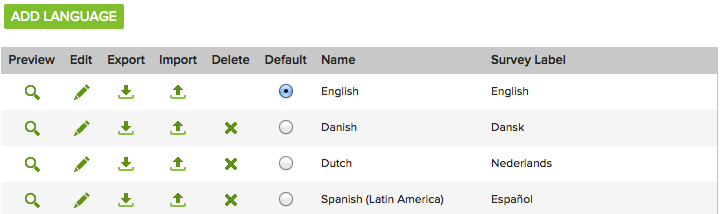
The Manage Languages option is accessible from the Options menu in Bonfire. It allows you to deliver your survey in multiple languages. The language option is fully unicode-compliant and there is no additional fee to use this functionality.
This is not a language translator; you will need to provide the translation yourself or work with an external translation service. These are the basic steps.
Step 1 - Create the Survey
Create the survey in the default language. English is originally set as the default language, although you can change it once you've added additional languages.
Step 2 - Add Languages
Within Survey Builder, go to Options |
Manage Languages and add each language you plan to use. You can
easily add additional languages for your survey. Keep in mind that adding
a language doesn't translate your survey. It just provides a mechanism
for you to provide the translation and allow users to choose the version
they want to see.
1. Click Add Language.
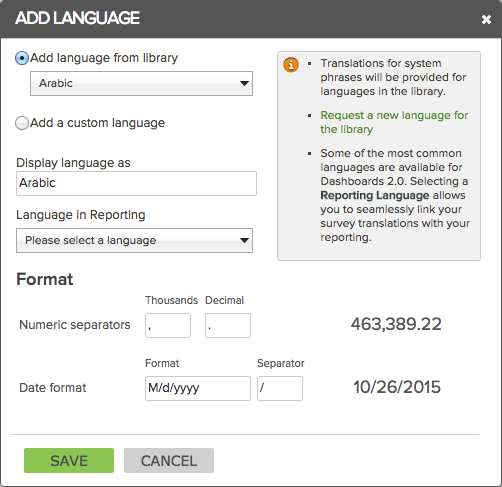
2. Choose one of the following:
Add a language from library - if you choose this option then the survey phrases will be automatically translated.
Add a custom language - if you choose to add a language that's not part of the pre-defined library, you'll need to translate the survey phrases as well.
3. Enter the display language name (usually the language name written in the native language), e.g. Italiano or Español.
4. Select the appropriate numeric separators and date format for the selected language.
5. Click Save.
Step 3 - Export Survey
Click on the Export icon in each language column to export the survey in each language.
Step 4 - Add Translations
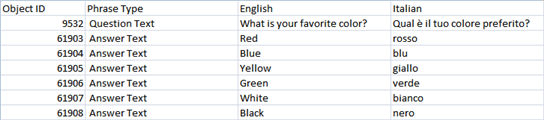
When you export a language, you'll end up with a .csv file with the following 4 columns:
Object ID - system-generated code used to identify the survey text
Phrase Type - shows whether it's answer text, question text, descriptive text, etc. All system phrases, such as error messages, are in the list, so you can translate those as well.
English - shows the text for each entry in English
New Language - use this column to provided the translation for each entry. If you use a translation service, you can send them the .csv file and have them send it back to you with the translation for importing.
 |
 |
Exported file before translation |
Exported file after translation |
Note: Do not edit anything in the first 3 columns of the downloaded file or the resulting translation will not load correctly.
Step 5
Once you have exported the survey in a new language, done the translation, and saved the file, it's time to import the file into your survey. On the Manage Languages screen, click Import in each language row:

Browse for the translated version of the file and upload it.
Step 6
Add the Language Selector question to the first page of your survey.
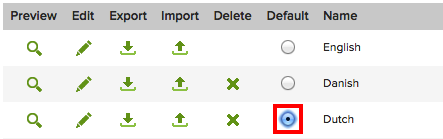
Originally, the default language for surveys is English. However, once you've added an additional language, you can easily change it to be the default.
To do so, go to the Manage Language page and click the Default radio button for the desired language.