The MaritzCX platform comes with a set of default email templates to help get you started. You should modify the templates on this list that you plan to use so that they meet your specific needs:
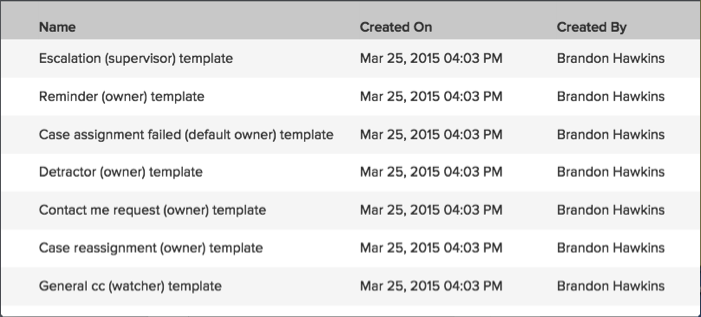
Escalation (supervisor) template - This generates an email to the caseworker's supervisor after a defined amount of time has elapsed with no action from the caseworker.
Reminder (owner) template - This generates an email to the case owner after a defined amount of time has elapsed with no action on the case.
Case assignment failed (default owner) template - This generates an email to the fallback case owner when a case could not be assigned to the intended case owner.
Detractor (owner) template - This is the primary case management email template; it notifies the case owner that a case has been created based on a customer's negative survey feedback.
Contact me request (owner) template - This email template informs the case owner that a customer requested to be contacted.
Case reassignment (owner) template - This generates an email to the new case owner when a case is reassigned from the original case owner.
General cc (watcher) template - This email template informs a case watcher that they are being given read access to a new case.
Step 1
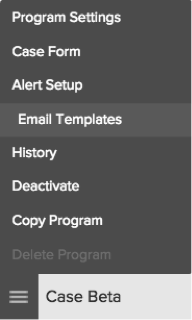
Go to the Manage Programs page.
Step 2
In the Program table, find the program whose email templates you want to modify. Click to the left of the program, then select Email Templates from this menu:
Step 3
The Email Templates page appears:
Step 4
Click to the left of the template you want to edit. The following action menu appears:

Select Edit from it.
Step 5
The Email Template page appears:
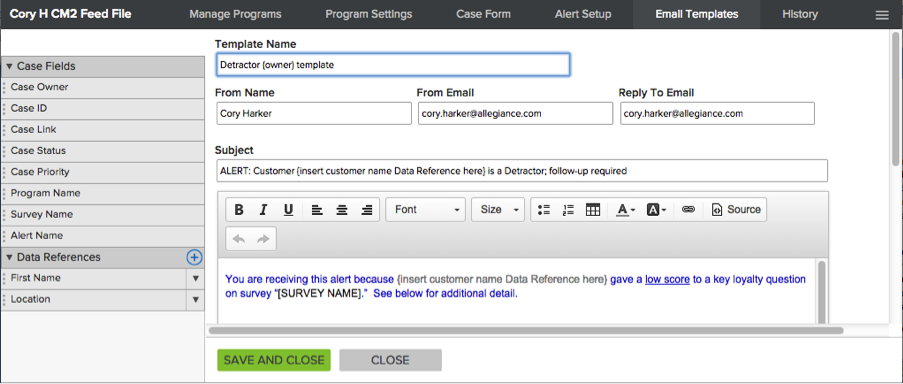
This is where you edit the email template to suit your needs. Take the following actions on this page:
Step 5a
In the field Template Name, decide if you want to change the email template name from its default value. If you do change it, the new name must not exceed 70 characters.
Step 5b
Set the From Name. This is the name that the email will display as from.
Step 5c
Set the From Email. This is the address that the email will display as from.
Step 5d
Set the Reply to Email. This is the address that a return email will be sent to by default. It is often the same as the From Email, but not necessarily.
Step 5e
Modify the email Subject as necessary. You will need to change all of the default email titles, since they contain parenthetical references to Data References that should be inserted.
Step 5f
Modify the body of the email as necessary. You do this in the main text entry area on the page:
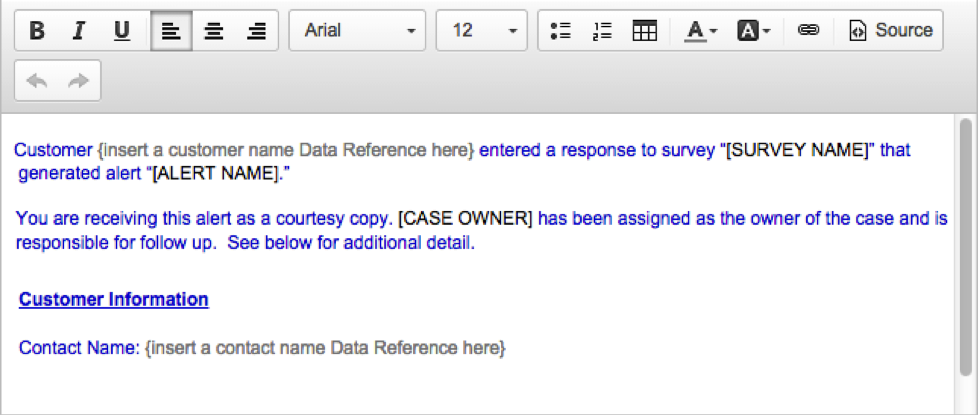
The toolbar at the top gives you access to standard text formatting and word processing features.
Note the two different types of parenthetical values present in the email text:
{} - Curly braces indicate a place where you should insert either a Data Reference from the associated survey, such as Contact Name or Contact Email, or a static value such as your own signature.
[] - Brackets indicate a system-defined data reference such as Case Owner. When you place your own custom data references, they will also appear within brackets.
Step 5g
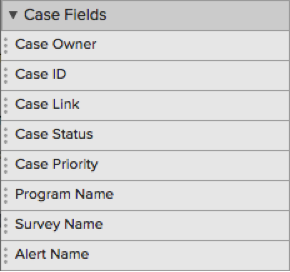
Case Fields are system-defined data references that communicate important aspects of your case. The Case Fields menu allows you to place these data references in your email template as desired:
To place one in your email template, simply drag and drop it to the desired location in the template.
The following Case Fields are available for you to add to your email template:
Case Owner - This is the owner of the case that was assigned in the Case Creation Rules screen of the Alert Setup tab of Case Management. Possible values for it include all registered users of the MaritzCX platform or users from a feed file or hierarchy file that you upload.
Case ID - This is a unique (within the product) number assigned by the MaritzCX system to identify the case.
Case Link - This is a hyperlink to the dynamic web page for the case.
Case Status - This is the status of the case, as entered by the caseworker in the Case Status dropdown. Possible values are: "New" (this is the default value when you first open the case); "In Progress"; and "Closed".
Case Priority - This is the case priority as assigned by the caseworker in the Case Priority dropdown menu. Possible values are "High", "Medium", and "Low". Caseworkers can sort cases on this value in their inbox and analysts can use it in reports.
Program Name - This is the name you assigned to the overall program in the Program Settings page.
Survey Name - This is the name of the survey that contains the question or questions that generated the case.
Alert Name - This is the name of the alert that triggered the case.
Note: It can be useful to think of Case Fields as system-defined variables that draw their data from the caseworking process.
Step 5h
Data references are essentially variables: they are placeholders for data that is pulled from the survey(s) that generated the case. They can come from either the survey questions themselves or from a feed file attached to the survey. Inserting them into your caseworker form and email notifications can provide important context and insight to your caseworkers.
The final step of modifying a default email template is placing the appropriate data references into it. For instructions on this, see here.
You have now created your email template. If you would like to send a test email to verify that everything is working correctly, press the Send Test button. The Send Test Email window opens:
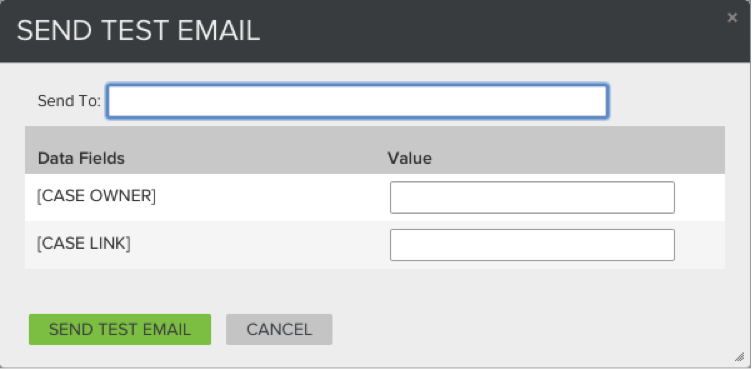
Fill out the Send To field with the desired email address. Note that any case fields or data references appear under Data Fields. Fill out their values as desired, then press Send Test Email.
When you are satisfied with the template, press Save And Close.