
When you first open the Case Inbox, you will see the default column headers:
You can easily modify these by dragging and dropping the desired data elements. Only a case management administrator can configure the columns. Configuring the Case Inbox columns configures them for all users.
Note: You can have a total of ten columns defined for your Inbox. However, one column can contain multiple sources of the same data type. For example, let’s say you have five surveys feeding cases in the Inbox, and from each of those surveys you want the OSAT question to funnel into the same column. This would only count for one of the ten columns.
To add a data element, follow these steps:
Step 1
Open the Data window. To do so, click on the action menu on the top left:

Step 2
The Data window appears:
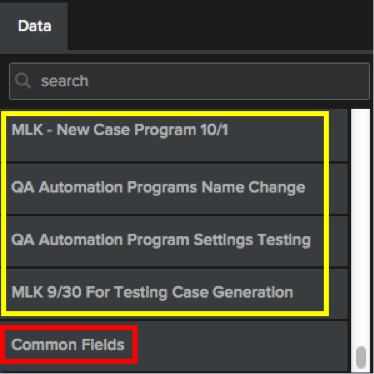
Note the two sections it contains:
1. Case Programs at the top, highlighted in yellow. Each of these contains sub-items similar to the ones illustrated in this screenshot:
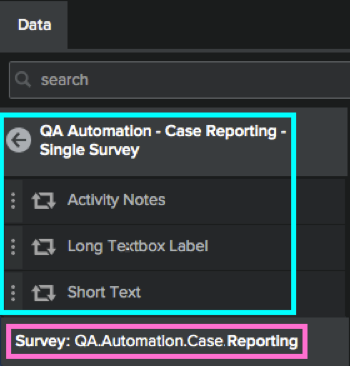
a. The Form Fields you defined in the program Case Form, highlighted in turquoise. These are specific to each program and include elements such as long and short text boxes and custom dropdown menus.
b. Survey fields, highlighted in pink. These include questions and other fields from the survey(s) your case management program is based on.
2. Common Fields at the bottom, highlighted in red. These are the system-defined Case Fields that span across all programs, and include elements such as Case Status or Case Priority.
Step 3
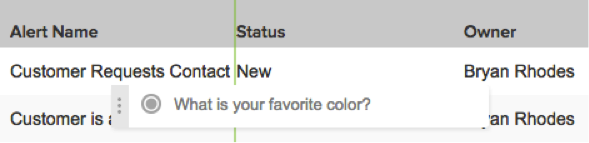
To add a data element to your table, simply drill down to find it and drag and drop it to the appropriate spot:
Note: When you want to add a column, be sure that the cursor displays a green line before you release the mouse. When the entire column displays as green, you are combining data elements. When the entire column displays as red, you are attempting to combine data elements in a way that cannot be done.
The new column appears in the table:

Continue adding data elements to your table as necessary.
To remove a data element, follow these steps:
Step 1
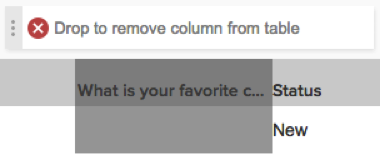
Click on the column you want to remove. Drag and drop it to the space above the table:
Step 2
The table is regenerated without that column:

Continue removing data elements from your table as necessary.
The Case Inbox gives you the ability to combine elements from different surveys into the same column. For example, let's suppose that you have three surveys, all of which contain some form of the question "Email Address". Follow these steps to combine the answers from all three of these survey questions into one column:
Step 1
Following these steps, add the question from the first survey to the table.
Step 2
In the Data menu on the left side, open the next survey that contains the desired question. Drag and drop it into the same column that you just created:

Note: When you want to combine data elements, be sure that the column displays as green before you release the mouse. When a green line displays between columns, you are adding a column. If the column displays as red, it means that the operation cannot be completed for some reason.
Step 3
Repeat Step 2 for as many data elements as you want to add to the column.
Sometimes it can be useful to rename column headers, particularly when you have combined data elements from different surveys. Follow these steps to do so:
Step 1
Click on the column header. The label turns into an editable text field:
Step 2
Edit the header as desired, then press the Enter button. Your new column header appears:
Note: In the case of a column you add from the Data pane, the default column name will be the token name of the first token you used to create the column.