
One important task in making MaritzCX survey data applicable to your organization's needs is customizing the default field labels to match the questions you ask in your survey. When you first see the MaritzCX survey field labels, they will read like this:
• Metric 1
• Metric 2
• Key Metric 1
• Key Metric 2
• Comments 1
• Comments 2
Let's say you wanted to re-label the fields in the following way to better reflect the survey questions you asked:
• Metric 1 = Net Promoter Score
• Metric 2 = Loyalty Index
• Key Metric 1 = Overall Satisfaction
• Key Metric 2 = Likelihood to Recommend
• Comments 1 = Detractor Comments
• Comments 2 = Promoter Comments
The following steps outline how to do this.
1. Go to Setup | Translation Workbench | Override.
2. Select "MaritzCX for Salesforce" from the Package dropdown menu.
3. Select the desired language from the Language dropdown menu.
4. Select "Custom Field" from the Setup Component dropdown menu.
5. Select "MaritzCX Response" from the Object dropdown menu.
6. Select "Field Label" from the Aspect dropdown menu.
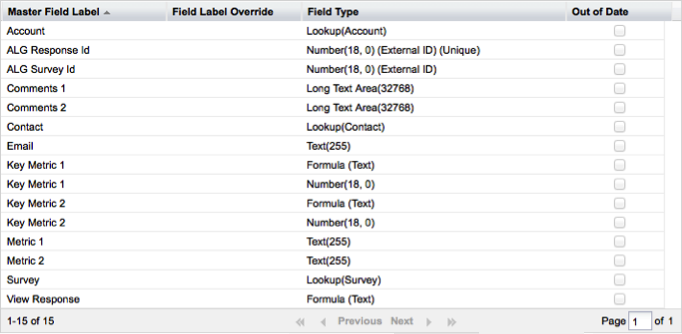
7. To change the label defaults, double-click in the Field Label Override column next to the label you wish to change. The table cell opens up to turn into a text entry box:

Enter the field label you want to display in the interface. Do this for as many labels as you wish to modify. For our example, this will leave us with a table that looks like this:

Notice that the unsaved changes appear in orange. Click on the Save button to save your changes. The values you entered change to black text, and the following message appears above the table:
