Record types allow you to offer different business processes, picklist values, and page layouts to different users based on their profiles.
You can use record types in various ways, for example:
• Create record types for cases to display different page layouts for your customer support cases versus your billing cases.
• Define a workflow rule that assigns MaritzCX cases to a particular record type, so that you can assign different business processes to these cases.
Follow these steps to create your case record type workflow rule:
1. Go to Setup | Build | Create | Workflow & Approvals | Workflow Rules. An introductory page appears. Click Continue.
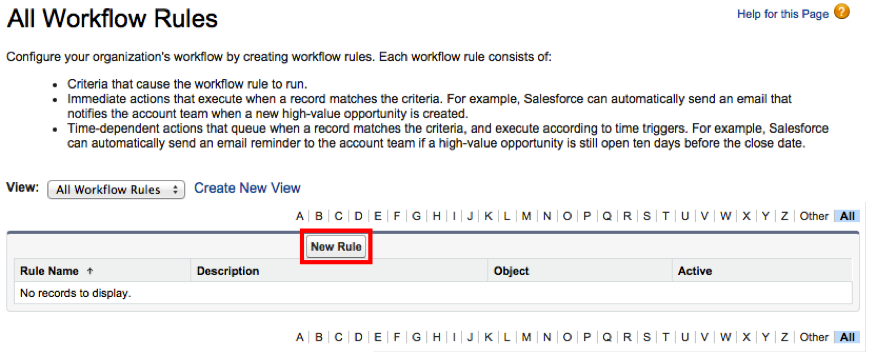
2. The All Workflow Rules page appears:
3. Click the New Rule button. The New Workflow Rule page appears:
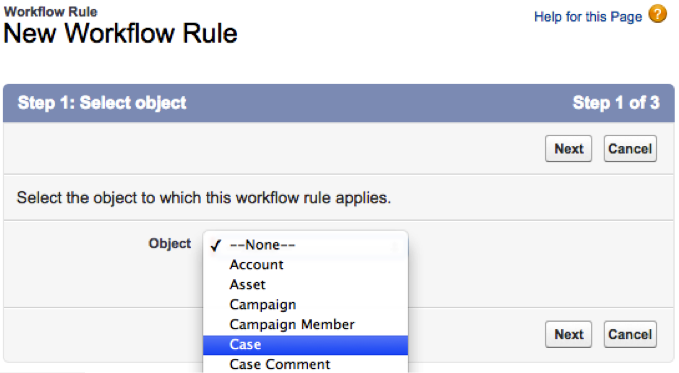
On it, select "Case" from the Object dropdown menu, then click Next.
4. The Configure Workflow Rule tab appears:
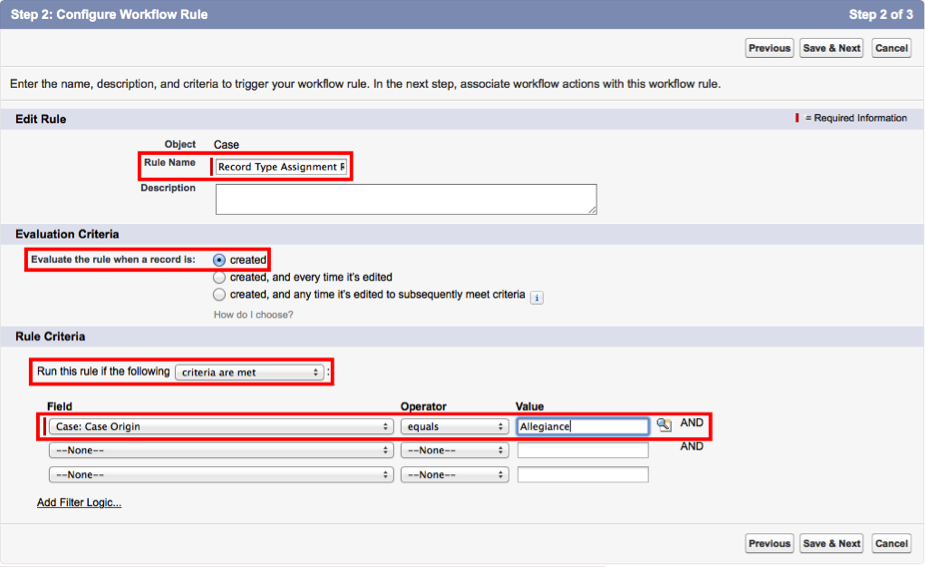
On it, you must perform the following actions:
• Under Edit Rule, enter "Record Type Assignment Rule" in the Rule Name field.
• Under Evaluation Criteria, select "created".
• Under Rule Criteria, select "criteria are met". Next, select "Case: Case Origin equals Allegiance". This will ensure that only cases coming from the MaritzCX platform are handled.
When you are finished configuring the rule, click Save & Next.
5. The Specify Workflow Actions screen appears:
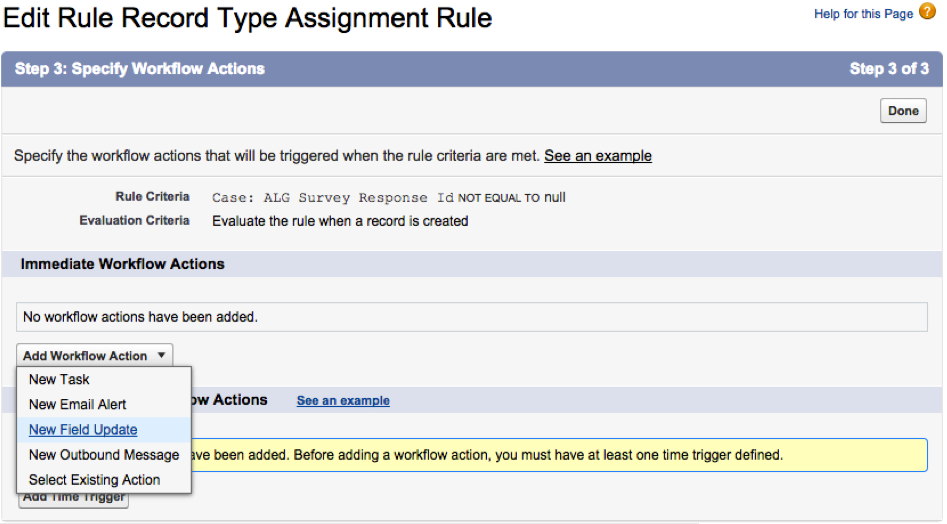
On it, you must assign the workflow action that needs to be taken based on the rule you have created. Select "New Field Update" from the Add Workflow Action dropdown menu.
6. The New Field Update screen appears:
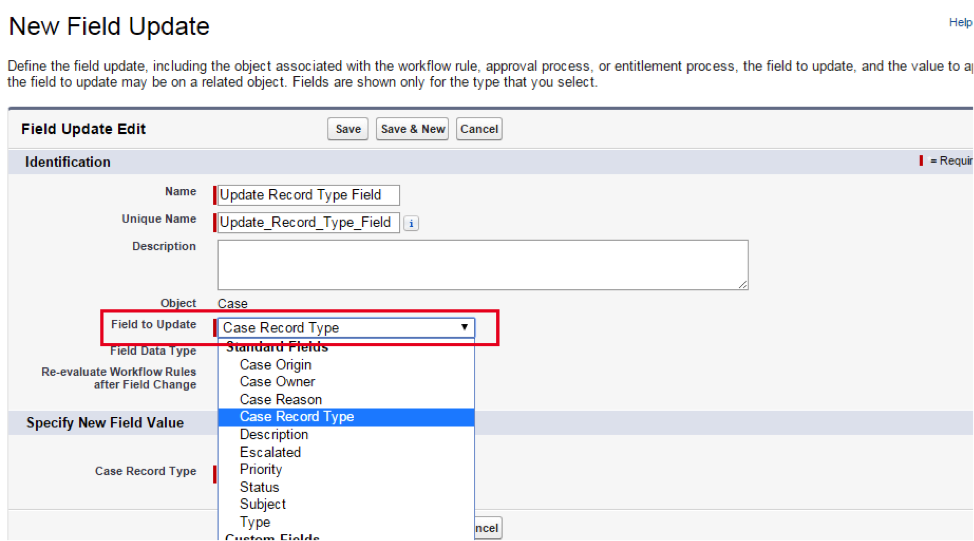
On it, you must perform the following actions:
• In the Name field, give the field update a name.
• Select "Case Record Type" from the Field to Update dropdown menu.
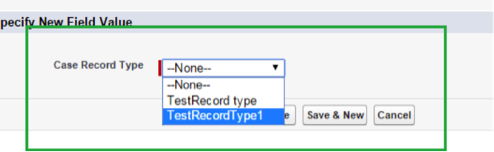
• From the Case Record Type dropdown menu, select the record type which should get assigned to the cases coming from the MaritzCX platform, as in the screenshot below:
Click Save.
7. You are redirected back to the Specify Workflow Actions screen. The new workflow action has been added, as shown below:
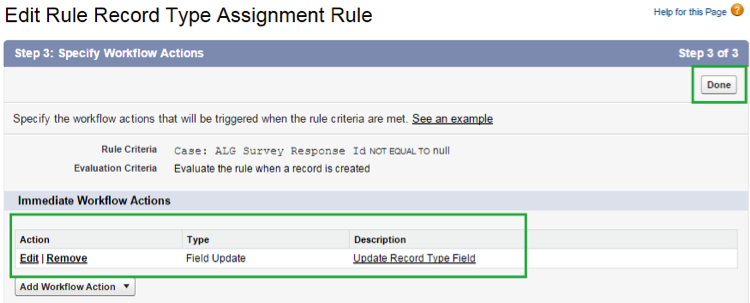
Click Done.
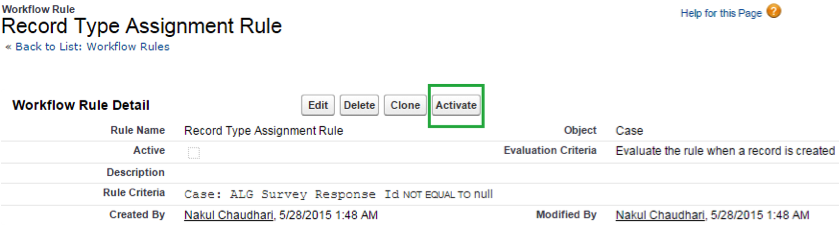
8. The final step is to Activate the workflow rule:
For more information on creating workflow rules in Salesforce, see the following links:
https://help.salesforce.com/HTViewHelpDoc?id=creating_workflow_rules.htm
https://help.salesforce.com/HTViewHelpDoc?id=creating_workflow_rules_activate.htm&language=en_US