
The next step in the MaritzCX for Adobe integration is to configure the Adobe platform.
Step 1 - Go to the Report Suites Page
Click on the menu icon in the top left of your browser:
Within the Adobe Marketing Cloud, take the following path through the interface:
Analytics | Admin | Report Suites
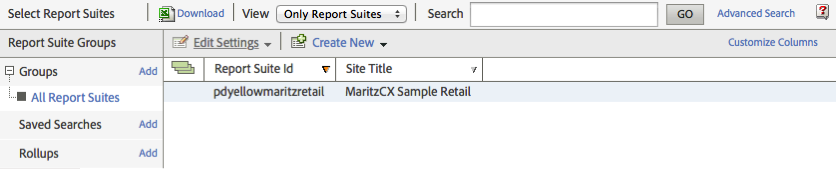
Find the report suite you want to modify, then select it and choose Edit Settings | Conversion | List Variables.
Step 2 - Define Your List Variable
The List Variables screen appears:
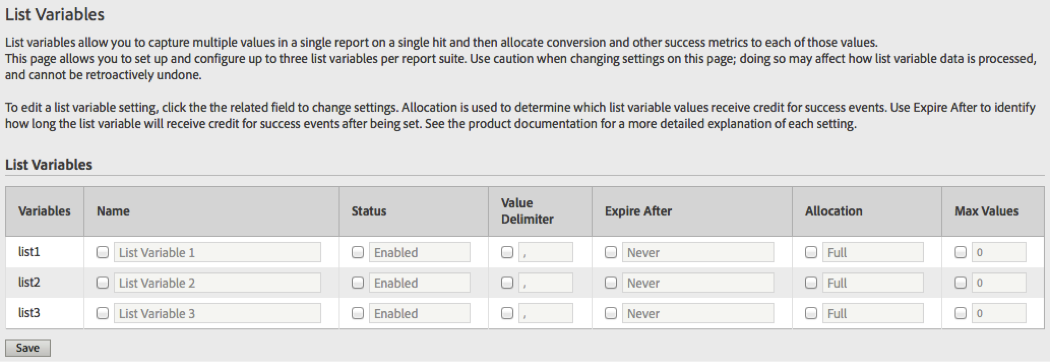
On it, you must configure your MaritzCX list variable. This variable will hold your survey data.
Select from the three available variables and name it as desired, then define the different values according to your needs. Be sure that its Status is "Enabled". The Value Delimiter should not be changed. The recommended setting for Expire After is "Never".
When you are finished, click the Save button. Your new variable will appear, similarly to this:

Step 3 - Define Your Conversion Variable
Now you must define your conversion variable. This variable will hold the MaritzCX User ID.
Within the same reporting suite, go to Edit Settings | Conversion | Conversion Variables. The Conversion Variables screen appears:
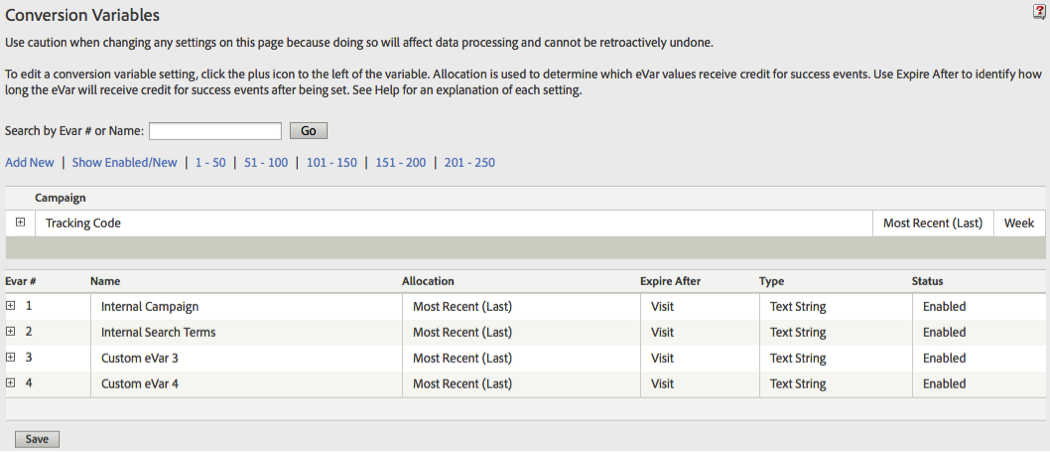
Click the Add New link. A new eVar definition window appears:
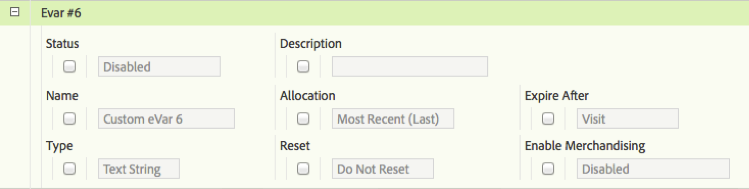
Give it a name like "MaritzCX Respondent ID", make sure it is enabled, and define its other settings. The recommended setting for Expire After is "Never" and for Allocation is "Most Recent".
When you are finished, press the Save button. A warning screen appears requiring you to confirm your changes. Click OK. Your new eVar appears in the table, similarly to this:

Step 4 - Define Your Success Event
Now you must define your success event. This success event reflects the number of times a survey was submitted.
Within the same reporting suite, go to Edit Settings | Conversion | Success Events.
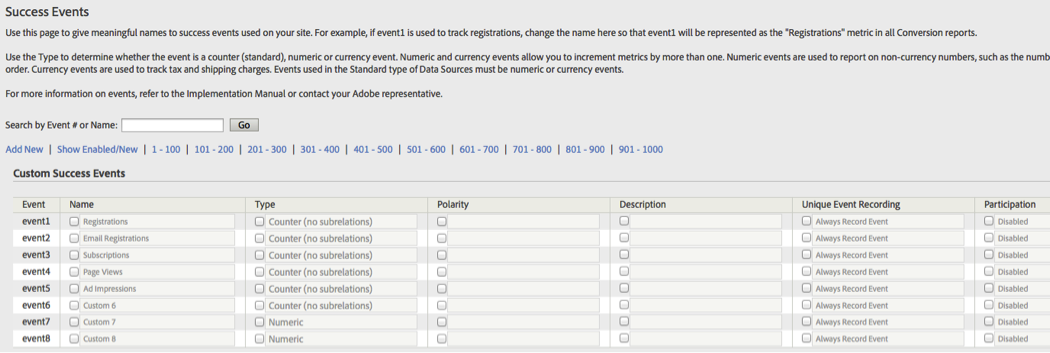
Click on the Name field of one of the undefined Custom Success Events and rename it to something like "Survey Taken". Under Type, select "Counter". Under Polarity, select "Up is good".
When you are finished, click Save. A warning appears asking you to confirm your changes. Select OK. Your new success event appears in the table, similarly to this:

Step 5 - Add the MaritzCX Data Connector
Now you must add the MaritzCX Data Connector to your instance of the Adobe Marketing Cloud.
Within the Adobe Marketing Cloud, go to Data Connectors | Add Integration.
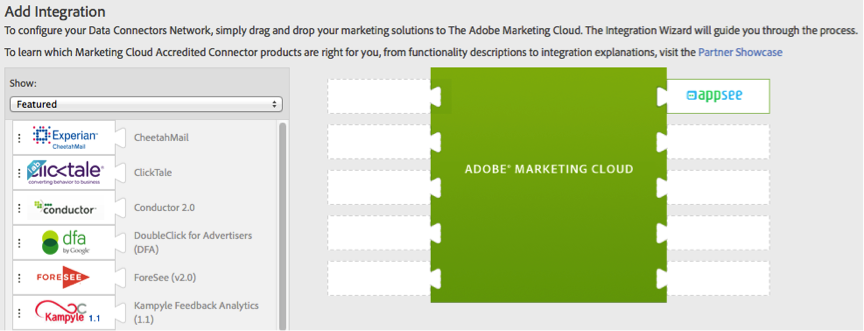
Scroll through the list to find the MaritzCX app. When you have it, drag and drop it into a free connector space in the Adobe Marketing Cloud palette on the right. The Terms and Conditions page appears:
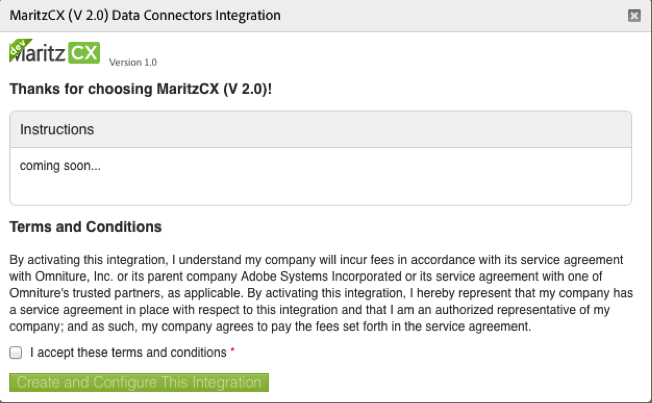
Click the acceptance checkbox at the bottom. When you do, the Integration Settings section appears:

Select the report suite you want to apply the settings to, give the integration a name, then click the button Create and Configure This Integration. You are taken to the first screen of the wizard:
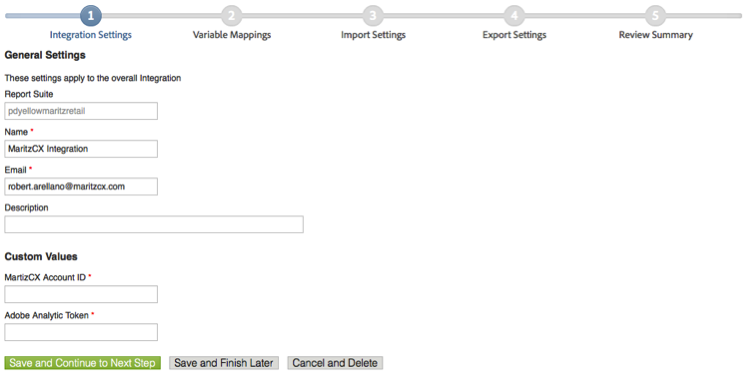
The required fields Name and Email are pre-populated. Talk to your MaritzCX account manager to get the custom values MaritzCX Account ID and Adobe Analytic Token.
When you have filled out all the required fields, click Save and Continue to Next Step. The Variable Mappings screen appears:
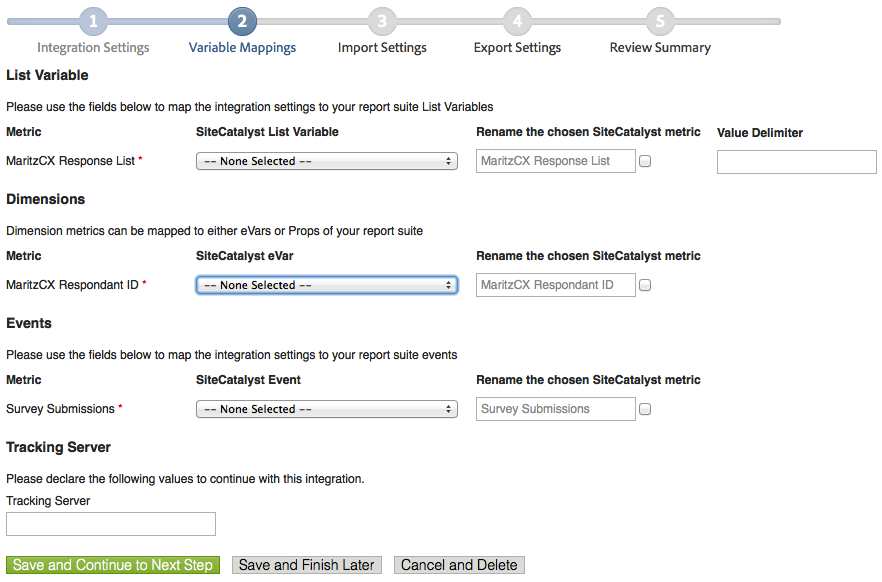
Use this screen to map your report suite variables that you reserved earlier to their corresponding metrics on the MaritzCX Data Connector.
Under Tracking Server, give your Adobe Tracking Server URL or leave it blank if unknown.
When you are finished, click Save and Continue to Next Step. The Classifications screen appears:
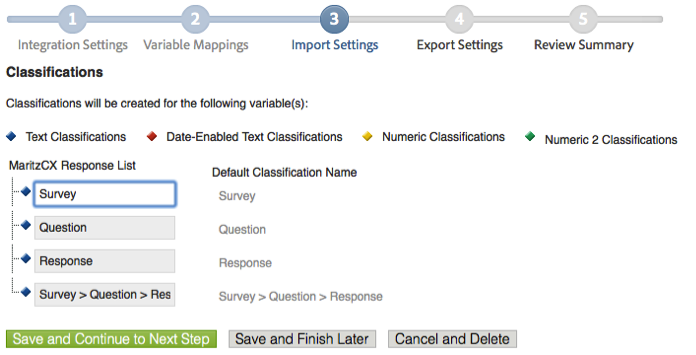
On this screen you can create classifications based on the list variable. Once these are enabled, you will be able to break down the report using these classifications. No action is required here.
When you are finished, click Save and Continue to Next Step. The Access Requests screen appears:
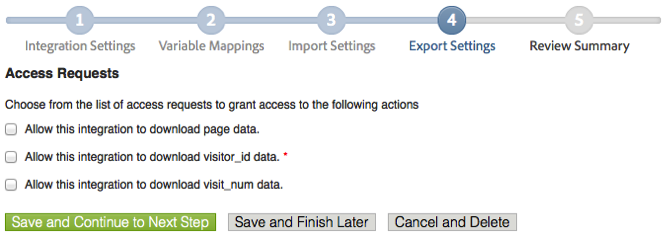
On this screen you select the types of data that you will give the integration access to. It is recommended that you check all the boxes, but you must at least give access to visitor_id data.
When you are finished, click Save and Continue to Next Step. The Summary page appears:
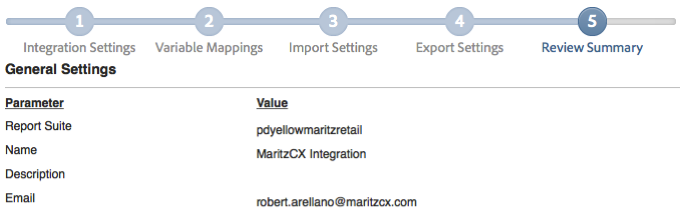
Review all of your settings to verify that they are correct, then click Activate Now.

Your MaritzCX for Adobe integration is now fully configured on the Adobe platform and ready to use.