
The first step in applying Adobe web site analytics to your MaritzCX survey data is to create the survey you're going to place on your web site. This survey will capture information from respondents and send it to the Adobe Marketing Cloud.
First, decide whether to build your survey yourself or have MaritzCX experts build your survey for you. If you decide to build it yourself, follow these high-level steps:
Step 1 - Create Your Survey
Take the following path through the interface:
Surveys | Engage7 Survey | New Survey
Name your survey, decide how many pages to make it, and select a theme. Hit the Create Survey button when you are done.
Step 2 - Design Your Survey
The Designer page appears:
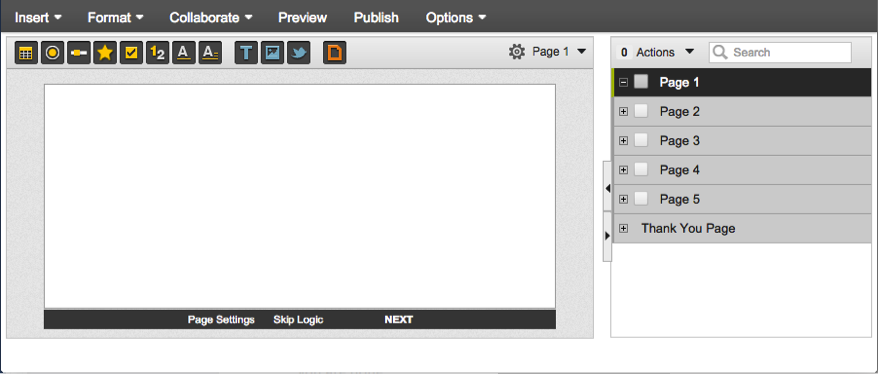
Use it to define your survey as desired, exercising full control over languages, questions, and look and feel. See the MaritzCX online help system for more instruction on using Bonfire.
It is vital that you include the following elements in your survey:
1. Adobe Beacon - The survey must have a hidden question that will hold the value of the ‘AdobeBeacon’. The Adobe beacon string will be generated by the website and then passed to the survey through a query string parameter, e.g. &AdobeBeacon=12345ABCDE.
Note: This Adobe beacon variable will be removed from the query string when the user’s survey session begins so that the user will not be able to see the value that is passed to the survey.
2. Categorical Questions - The questions you use to capture information and send it to the Adobe Marketing Cloud must be either choose one, choose many, or text-as-categorical. You can use between 1 and 10 survey questions for this.
3. Question Tags - Each question that is sending information to the Adobe Marketing Cloud must be tagged.
4. Provide Information back to MaritzCX - Finally, provide MaritzCX with the following information:
MaritzCX Information |
|
| Account | |
| Survey Name | |
| Survey Code | |
Survey Question Tags |
|
Question 1 |
|
Question 2 |
|
Question 3 |
|
Question 4 |
|
Question 5 |
|
Question 6 |
|
Question 7 |
|
Question 8 |
|
Question 9 |
|
Question 10 |
|
Step 3 - Publish and Activate Your Survey
When you have finished creating your survey, click the Publish button. The Publish Survey screen appears:
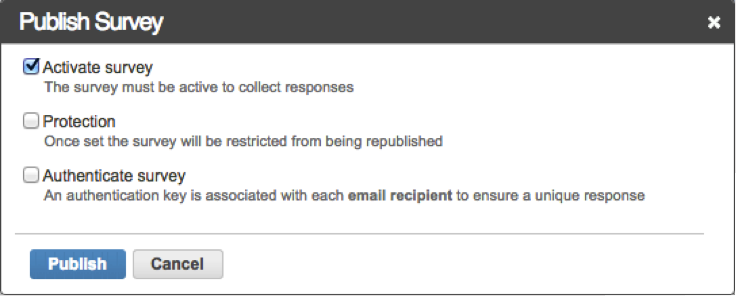
Make sure the Activate survey checkbox is checked, then click the Publish button. Your survey is now ready to collect answers from respondents.